|
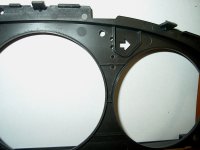
First I disassembled the gauge cluster. Then I took the distance of the led's from the KnockLink box, and drilled holes in the correct size. This is an very tiny job, and needs to be done very very carefully.
From memory the big red led is 0.5 mm exact, and the four other ones are 0.3 mm.
|
|
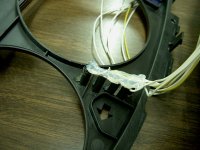
Then I installed the led's into the dashboard, and glued them, so they don't fall off. The led's are having a different polarity. So be sure you connect power and ground the correct way.
Unfortunately the big red led could not be installed right on top of the other four. If I did so, the led should come behind the dashboard, and could not be seen.....
|

|
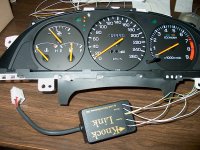
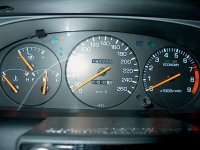
This is a pic with the cluster installed a little loose together.
|

|
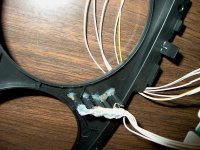
And the leds installed.
|
|
This is the complete build kit. You can see the ugly box. Removing the leds from the circuit board needs to done very carefully, and more care needs to be there when you install the wires on to the circuit board. If the board gets to hot, the board can gets damaged, and that is an expensive solution......
|
|
The gauge cluster back in the car again. Here you can see that the big led on top could not be right above the other four leds.
I turned the sensitivity the most sensitiv way, taped the wires, and tie wrapped the whole stuff somewhere behind the dashboard.
|
|
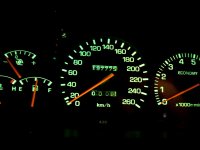
And a pic in the dark. Important, because I did not want false dashboard light shining through the leds, making me think of alarm.
If you take a close look you can see the bottom green led burn a little, showing the KnockLink is armed.... :)
|
)
)
)
)
)
)
)
)